Slack and Github are two of the most commonly combined applications across software development companies. As a developer, I see this combination of Slack APIs and Github APIs as one that can be utilized to assist with project management. We are doing something similar in our company, (Krumware) by building out Slack commands like /myissues, which gives you a list of your assigned issues across your Git repositories within Slack, and /screenshot, which posts a screenshot of your active Chrome tab using WebSockets and sends it to the person you are messaging.
Not only we are using Github within Slack, but we are also creating a way to use Slack within Github. For example, in an issue/pull-request on Github, I can write a comment like /remind me about this :issue: at 9:00 AM tomorrow and, with the help of webhooks, I can create a Slack reminder on Github. Pretty cool, right? I will discuss all of these topics and more in this multi-blog series and, by the end, you will learn how you can use WebSockets, Github APIs, and Slack APIs, in combination with a Chrome extension and a simple Node JS server, to help increase your productivity. Oh, and all of the commands and Git extensions I mentioned above are automated by our company bot, Krumbot.

In this post, we will learn about Slack APIs and how to create a simple /slash command. You can use Slack APIs with anything RESTful. After all, all it does (well, mostly does) is send a POST request along with some information, so we just need to build a node.js server that listens for these POST requests.
What is Slack?
Well, as the people at Slack say, it's "Where work happens". Our company relies heavily on Slack for communication, both between team members and with external clients. It has always been our preferred medium of communication and our company recognizes the importance of this product. Slack is not just a "chat" platform; it is an app that is able to mold to your personal or company’s needs.
Since this product is so versatile, we as software developers and engineers can utilize Slack to build tools that manage our workflow and activity. I am the kind of person that wants to make most of any situation and if a product like Slack allows me to do this, I will find a way to make it even better. I love playing with APIs, but the robustness of Slack’s APIs is terrifying. It is very well thought out and, at the same time, defined to the most basic level. I will begin this post by showing you how to create a simple Slack app.
Creating a Slack App
- Alright, go to Slack API
- Sign in to your account and, once logged in, click on
Your Appson the top right of your screen - Then, you will see something like this:
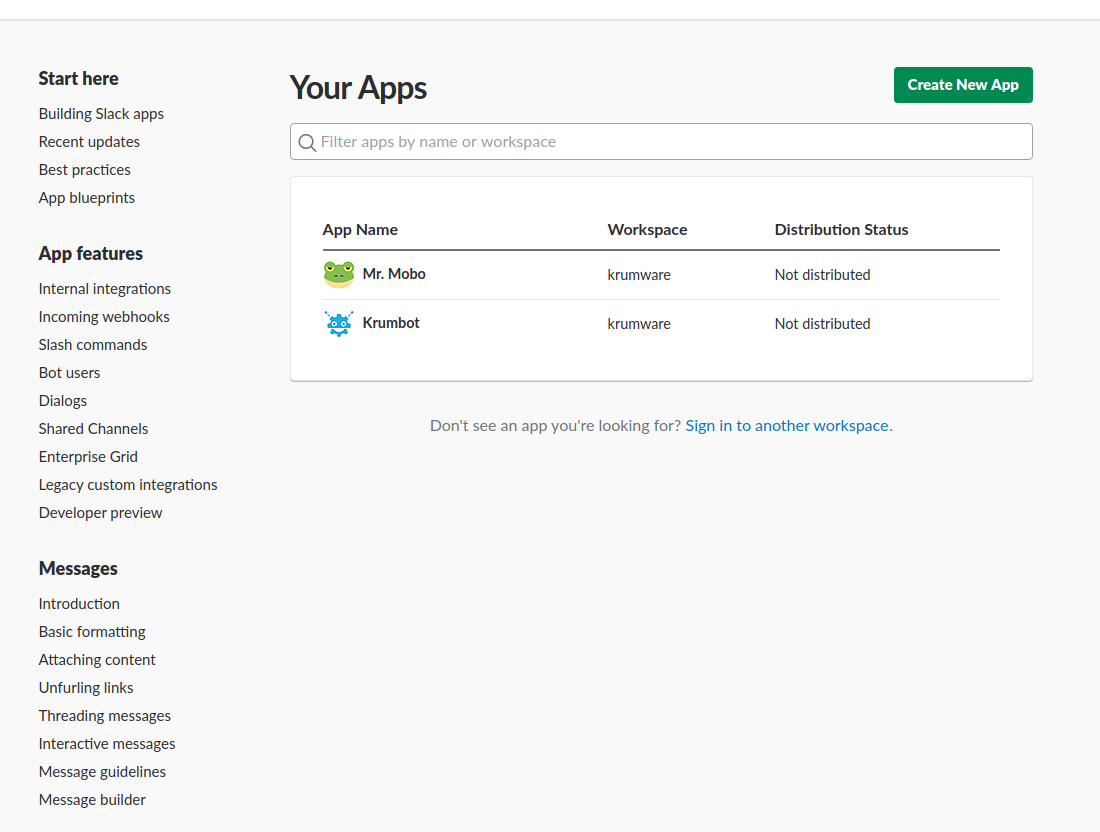
Don't mind Mr. Mobo. It's my pet (well, virtual pet) that sends me a Slack message every time someone enters my room. It is hooked up with a Rasberry Pi and a RaspiCam. I can take a picture of any person that enters my room just by using a /slash command called /intruder, which will be covered in future posts. But anyways…
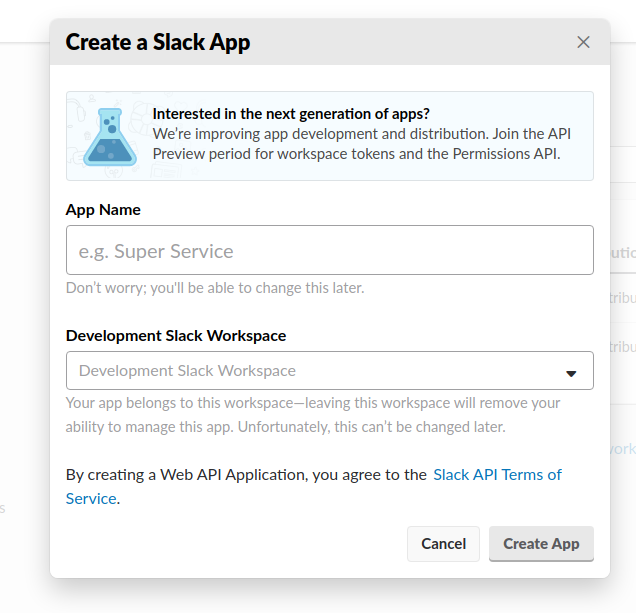
- Click on
Create New App, which will take you to this screen:
 .
.
Select a name for your app and a workspace to install it and voila! You are now ready to do something awesome.
Building Slack Commands
There are many uses for Slack APIs, but I will start by showing how to create a slash command. On the Basic Information page of your app, you will see Features in the side menu like this:
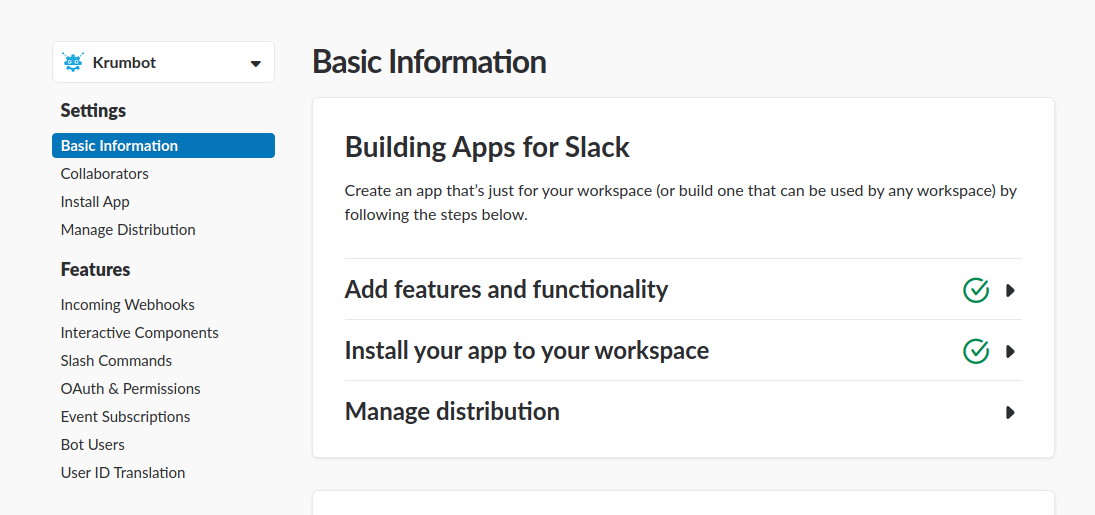
Find and click on Slash Command menu item. You will be prompted with a page that shows your existing commands and it will also give you an option to create a new one. Click on the Create new command button and you will see something like this:
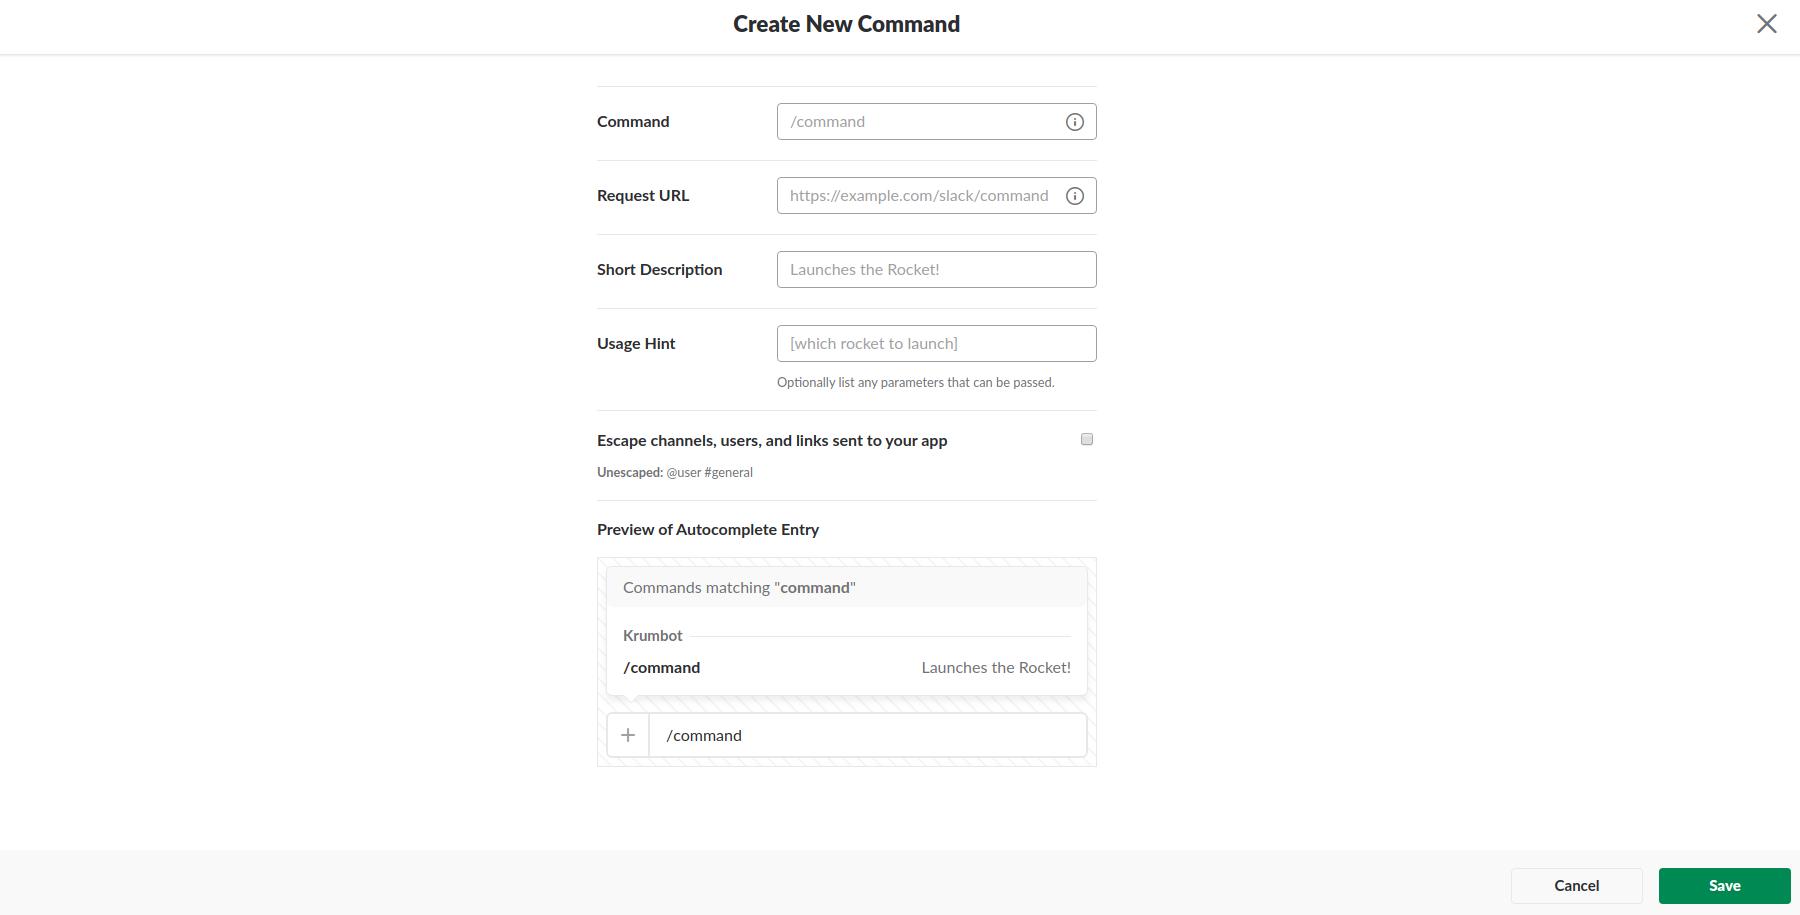
We will start off by building a simple /yesno command, which can be used to answer any yes or no question you may face. To trigger this command, you simply type /yesno <type a question> and it will respond with a captioned yes/no gif (or jiff...). As you can see in the image above, there is a field called Request URL, which requires you to provide a URL for Slack to do a POST request on. For security purposes, the URL must use https protocol.
Now, owning a SSL certificate can be expensive, but there are some free ones out there. If you are using Docker, you can use configure letsencrypt as a service and it will generate SSL certificate for free. Since we only want to create a server that listens for POST request, we can use Ngrok to get a free https:// URL (keep reading for instructions). For now, let's focus on how to create a simple express node.js server.
You can either follow this tutorial or clone this repository (https://Github.com/grudra7714/yesno). I have packaged all of the necessary modules, so all you need to do is copy OAuth Access Token from the OAuth and Permission menu item from the screenshot I posted earlier. Slack's OAuth Token usually starts with xoxp-. Copy this OAuth Token and paste it into an environment variable in your .env file.
Next, open the cloned repository in your favorite editor. You will see something like this:
const express = require('express')
const app = express()
const rp = require("request-promise");
const path = require("path");
const request = require("request");
const bodyParser = require('body-parser');
const querystring = require("querystring");
const fs = require("fs");
const http = require("http");
require('dotenv').load();

app.use(bodyParser.json());
app.use(bodyParser.URLencoded({ extended: true }));

let token = process.env.SLACK_OAUTH_TOKEN;

const postToSlack = async (endpoint, payload) => {
    var data = {
      URL: endpoint,
      body: payload,
      headers: {
            'Content-Type': 'application/json'
        },
        json: true
    }
    return await rp.post(data);
}

app.post("/api/yesno", async (req, res) => {
	let yes_no = await rp.get("https://yesno.wtf/api/");
	let obj = JSON.parse(yes_no);
	if(!token) {
		var body = {
			attachments: [{
				"pretext": req.body.text,
				"text": obj.answer,
				"image_URL": obj.image,
			}],
			"channel": req.body.channel_id,
		};
		await postToSlack(req.body.response_URL, body);
	} else {
		var body = {
			attachments: JSON.stringify([{
				"pretext": req.body.text,
				"text": obj.answer,
				"image_URL": obj.image,
			}]),
			"channel": req.body.channel_id,
			"as_user": "false"
		};
		var data = {
			URL: 'https://Slack.com/api/' + 'chat.postMessage' +'?token='+ token,
			formData: body,
		}
		let a  = await rp.post(data);
	}
	res.send("");
})

app.listen(process.env.PORT || 6000, function () {
  console.log('Server listening on port ' + (process.env.PORT || 6000));
})
This is the most basic backend implementation of a slash command. Now, let’s dive into this piece of code:
app.post("/api/yesno", async (req, res) => {
	let yes_no = await rp.get("https://yesno.wtf/api/");
	let obj = JSON.parse(yes_no);
	if(!token) {
		var body = {
			attachments: [{
				"pretext": req.body.text,
				"text": obj.answer,
				"image_URL": obj.image,
			}],
			"channel": req.body.channel_id,
		};
		await postToSlack(req.body.response_URL, body);
	} else {
		var body = {
			attachments: JSON.stringify([{
				"pretext": req.body.text,
				"text": obj.answer,
				"image_URL": obj.image,
			}]),
			"channel": req.body.channel_id,
			"as_user": "false"
		};
		var data = {
			URL: 'https://Slack.com/api/' + 'chat.postMessage' +'?token='+ token,
			formData: body,
		}
		let a  = await rp.post(data);
	}
	res.send("");
})
Here, we have defined a listener for the route /api/yesno. This says that if Slack does a POST request on https://abc.com/api/route, the above code will execute. Now, whenever Slack does a POST request, it includes a bunch of parameters, mainly:
{ token: '',
  team_id: '',
  team_domain: '',
  channel_id: '',
  channel_name: '',
  user_id: '',
  user_name: '',
  command: '/yesno',
  text: 'this is awesome right?',
  response_URL: 'https://hooks.Slack.com/commands/dsadas/fsadsdfsd/dfsadsfdds',
  trigger_id: '46546464.65465466.46646464665465545646546546546' }
There are many ways you can respond to this message. If you didn't define your token, you can do a POST request on the response's URL (in the block of code above) or you can use Slack's chat.postMessage method. The latter allows you to send the response as a user or as the app. If you want to send the response as the app, make sure you have proper permissions, specifically the chat:write:bot permission. You can learn more about Slack permission scopes here
Before all of this, make sure you do a npm install so you can use proper node_modules. A package.json file has been included in the repository. Once this is done, you can run your server using nodemon server.js. To get a public https:// URL, open a new terminal and use ngrok http 6000 command. This is will create a secure tunnel to your localhost:6000 URL. Copy the https:// URL and paste in the Request URL page of the create slash command. Now, whenever you use /yesno <question> command in your Slack workspace, it will do a POST request on that URL.
Coming Soon...
In my next blog, I will discuss how to integrate Github APIs with Slack by building a command that allows us to create an issue on Github. We will use this feature, in combination with a Chrome Extension, to produce a screenshot of your active tab over websockets and include pictures with your issue.